My buddy Stephen and I played our second game of the campaign we have going “Operation Cyan Rapier.” I’ll talk about Phase (game) 1 later, but today’s game was the follow-on from that game in which the UCM managed to successfully extract a Praetorian insertion team that had gone into enemy territory to link up with local Resistance forces. The mission was (barely) successful and victory was won at great cost to the UCM Praetorians. So, here is the preamble to Phase 2:
Operation Cyan Rapier – Phase 2 – Decapitation
After the successful (but costly) recovery of the Praetorian insertion teams from Estrella del Mar, UCM command gives the go-ahead for Phase 2, a strike at the Scourge command elements in the area of operations. With the Praetorians taken out of the line to recover, UCM General Magday reluctantly decides to commit his heavy assets, hoping to deal the Scourge a knockout blow before the main landing operation. This is a risky and controversial strategy, as the relatively small UCM task force assigned to this operation cannot afford many losses. Nevertheless, the UCM forces once again prepare for battle.
Unbeknownst to the UCM planners, the Scourge have more reserves than originally thought, and have managed to keep them hidden even from the Resistance spies. As a result, their defenses near their headquarters complex will be at full strength to face the coming assault!
It was a modified version of the Decapitation scenario in the main rulebook. 1750 points for both of us, and Stephen got an extra 350 point battle group to represent the unknown reserves (which would start rolling for entry on turn 3). I do a lot of my own scenario design and a favorite method is to take an existing scenario and tweak it in interesting ways. You’ll see more of this when I talk about the Snipers a bit later on.
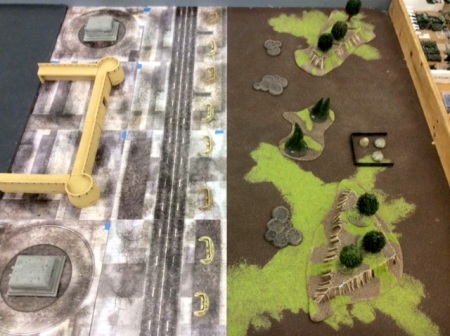
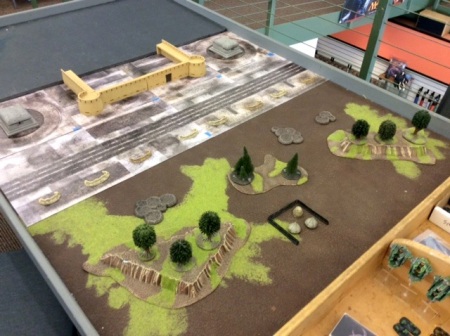
In this campaign I am also making an effort to do more rural and less heavily urban terrain. This scenario thus featured fully half the board as hills and wooded areas, and the other half a mostly open landing field. It makes for a very different feel than the usual tight cityscape we most often play in.
So, was the UCM able to take out the Scourge Overseer? Read on!
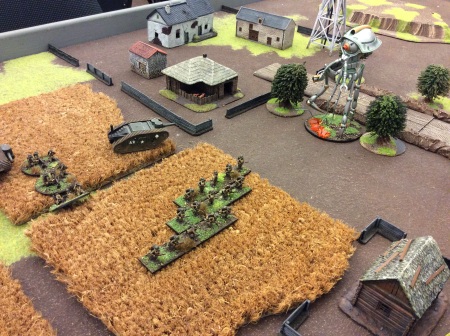
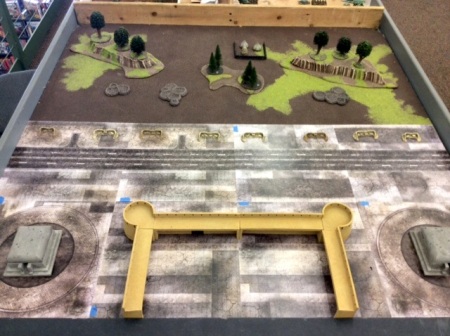
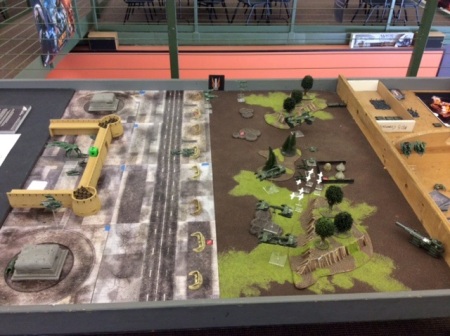
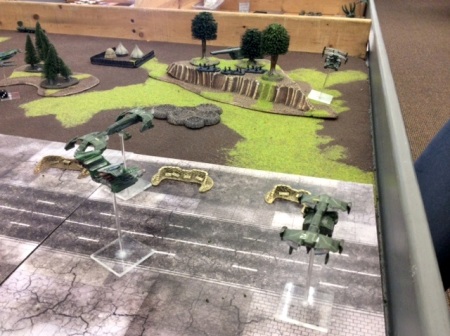
Here’s the battlefield. Pretty long sight lines. In that regard it favors the UCM, but, the UCM has to attack and close the distance in this mission and the Scourge has to defend, so perhaps both sides’ favored roles are switched up? Definitely a challenge for us both. The idea was the UCM was attacking the local Scourge command base, which was established in an old air/spaceport (you can see the runway there). The walled off area was the command center, and there are two bunkers. A string of fighting positions lined the edge of the airfield. Off in the rough, there are a couple of wooded hills, some abandoned huts and a few fading craters leftover from the Scourge invasion centuries ago.
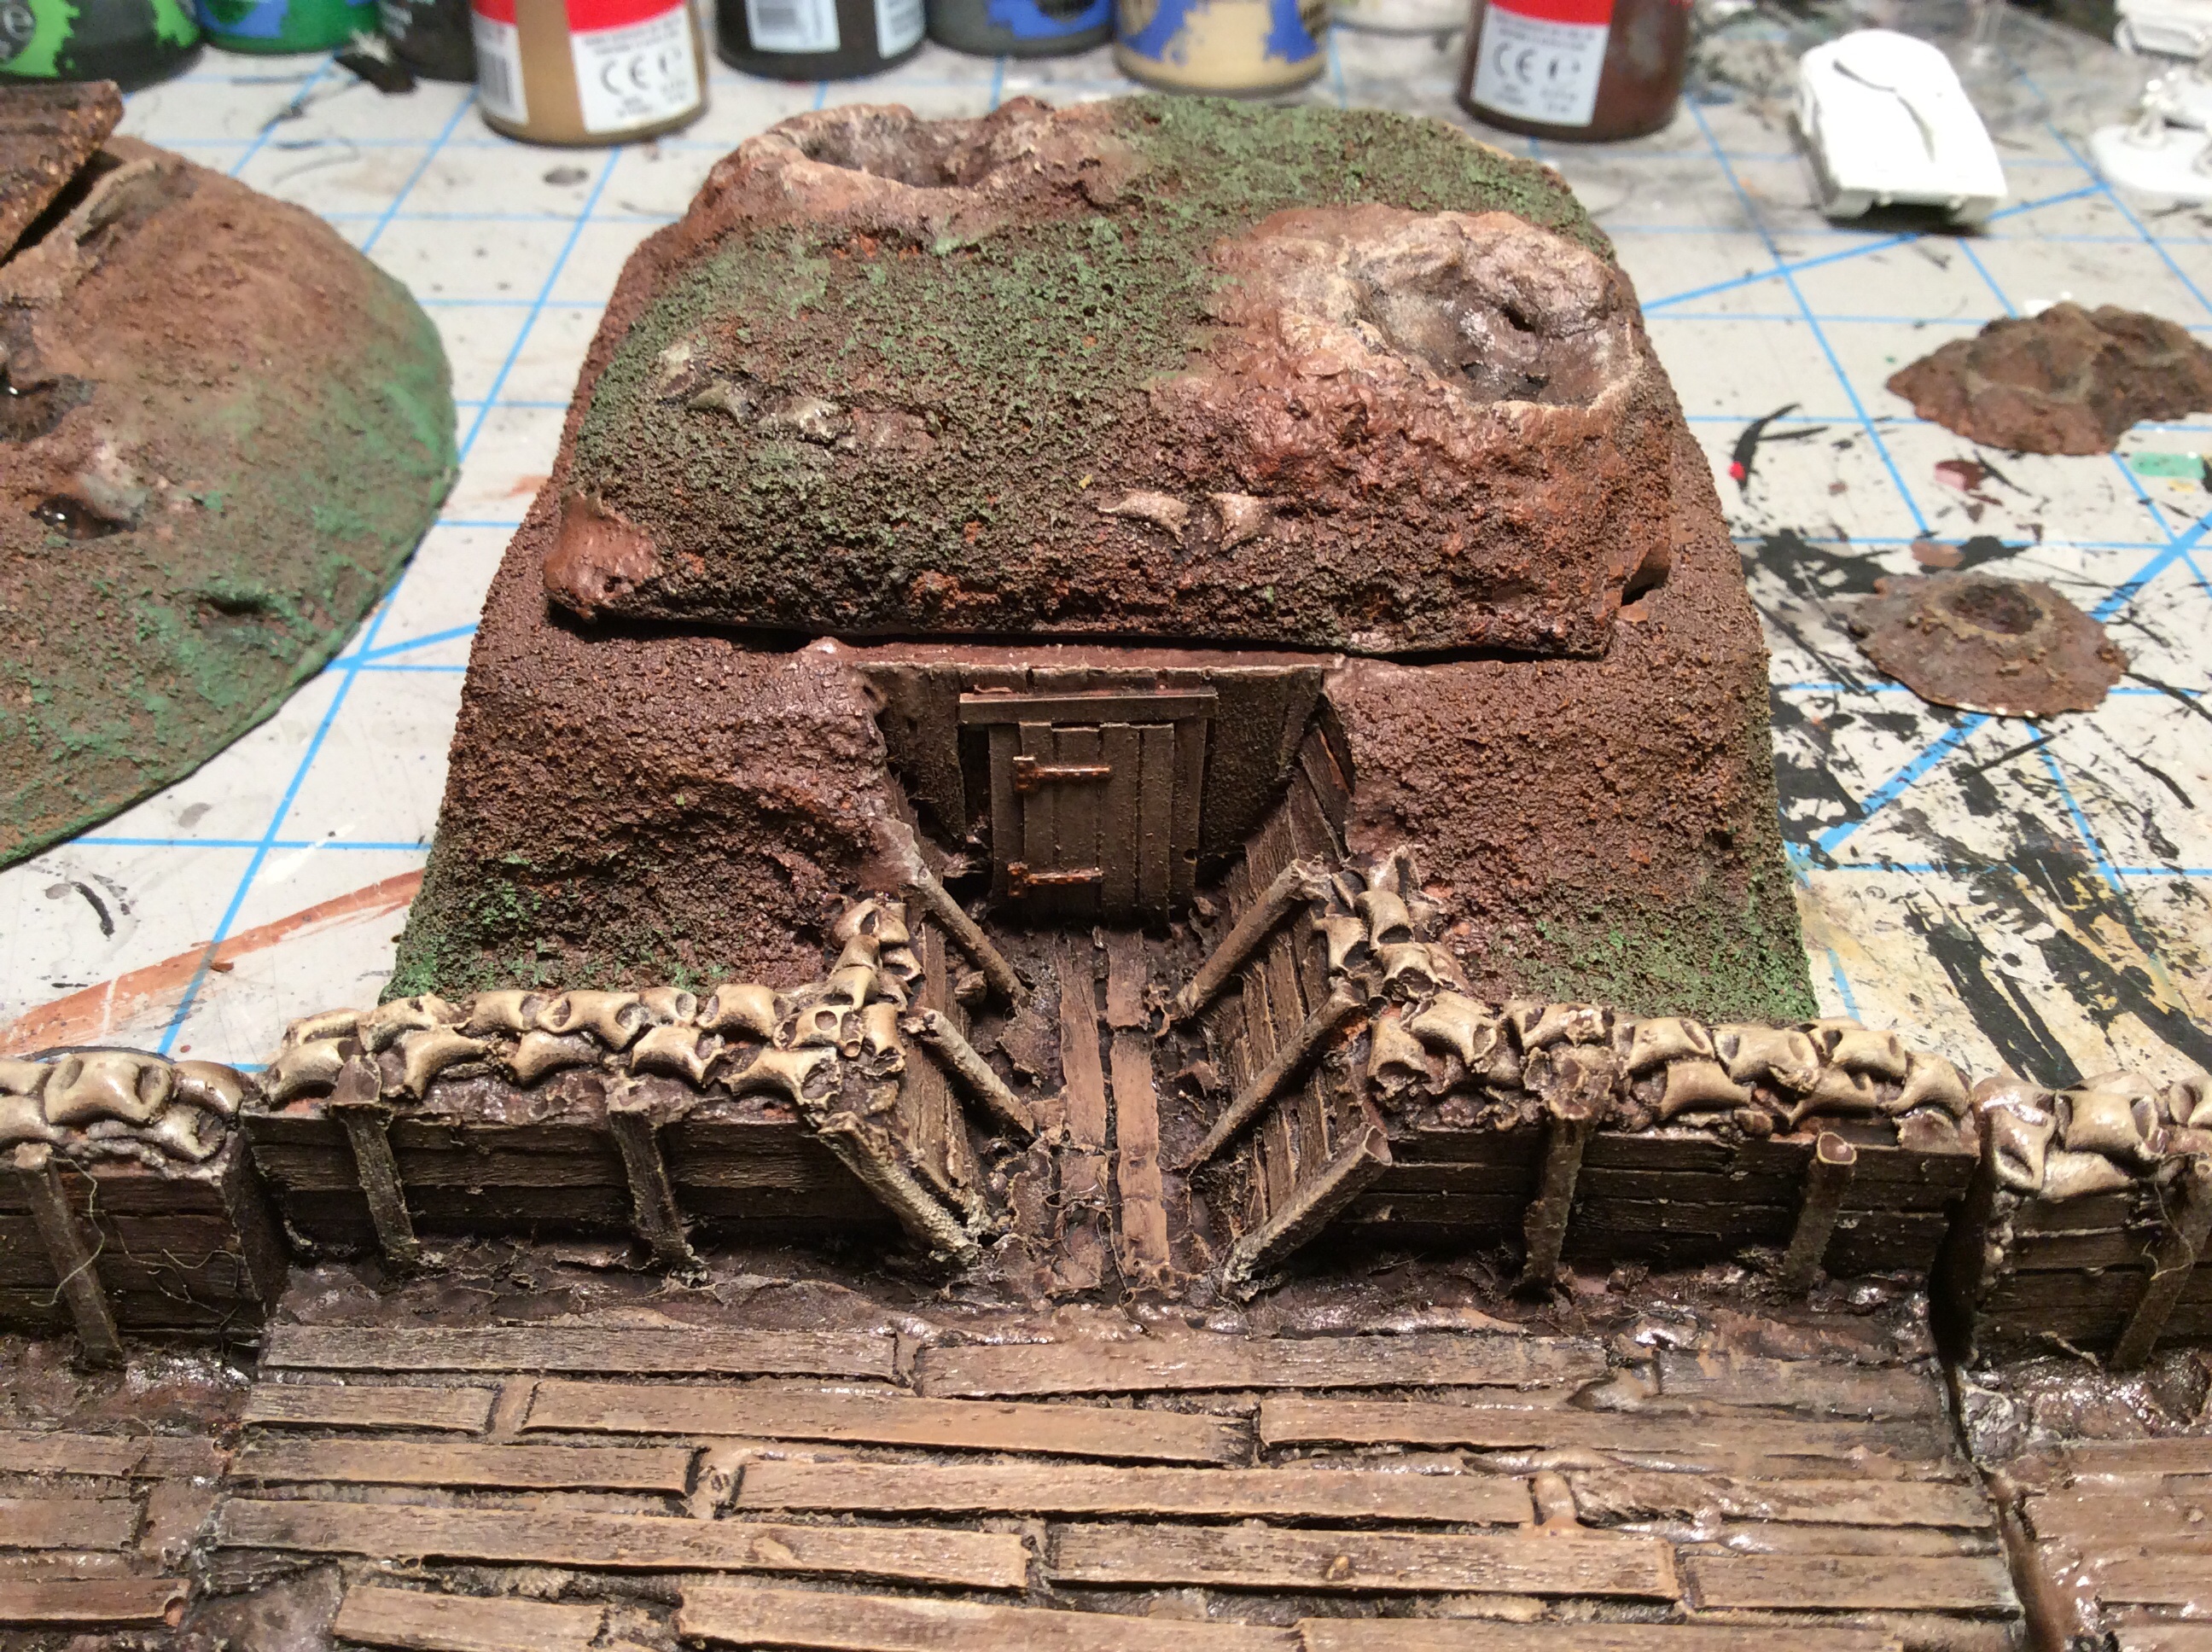
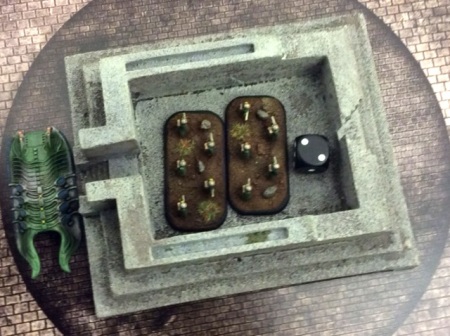
In the Decapitation scenario, the Defender sets up inside a fortified area. The Scourge used the old human terminal as their base. Each wall section and turret is Hardened with 10DP. Steve had a bit of trouble figuring out his list and didn’t have enough AA initially (extremely important in this scenario since keeping his Command unit alive was the key to victory), but we re-jiggered his list a bit and got it straightened out. Here, his Reapers form up around the Overseer (UCM codename: Broken Tower) with a squad of Hunters ready to burst out of the gate. Warriors line the parapets.
Taking out Broken Tower was my objective. Steve’s objective was avoid losing his Commander, or at least make any UCM victory as costly as possible. This position seems a tough nut to crack – indeed although I had 2 squads of 2 Archangels each, going into that AA bubble was a frightening prospect!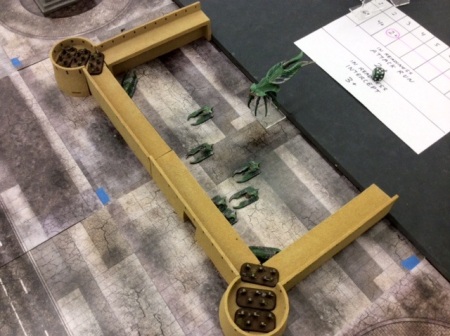
A bit hard to see here but there are 5 Possible Objective markers. These represented possible hidden locations of my Praetorian Sniper squad. Until the actual squad was revealed, these markers all had the Scout ability, representing remote sensing equipment and digital ghillies set up by the Snipers who had infiltrated the are before the battle. If fired at, they could only be hit on a natural 6 but if the snipers were actually there, they would take damage, otherwise the marker would be removed. If a Scourge unit moved into base contact, they would also be instantly removed and the snipers revealed if they were there. I borrowed on the Infiltration rule from 40K, allowing me to place a marker in cover as close as 12″ from an enemy, and no closer than 24″ if out in the open.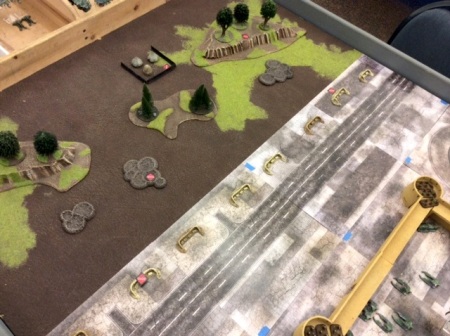
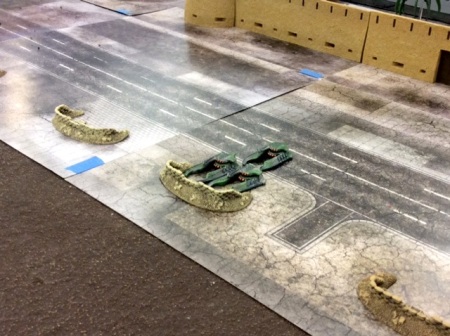
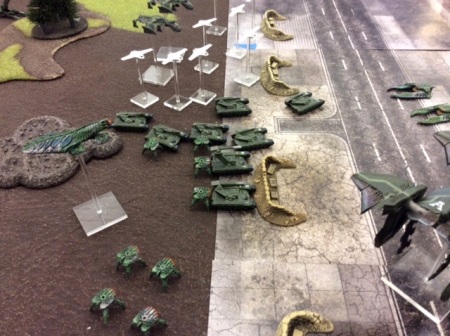
At the end of T1, the UCM forces are surging on to the battlefield. I have a big tank blob of 6 Sabers and 3 Rapiers in the Albatross. You can see my Longbows down and deployed near the huts. The Ferrum has launched its flight of drones and the Legionnaires and Heavy Ordnance battle groups are going in. My command Kodiak is out of the frame at the bottom left. Steve has raced forward with a squad of Hunters, driving them into one of the fighting positions with the use of a Command Card (Overdrive??) I lucked out and got one squad of Archangels out of Reserve on T1, but they failed to arrive for an attack run. No biggie.
Warriors deploy into the bunker on the right.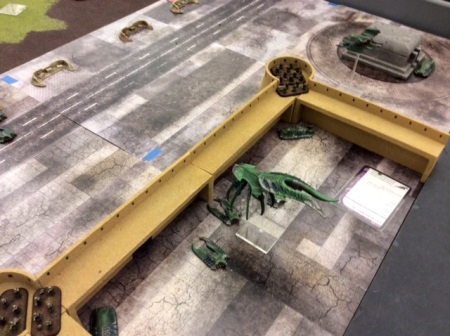
Turn 2 action: Scourge Corsairs sweep in on an attack run against the fully loaded Albatross, the big fat transport making a terrific target! I committed both my FM squads to intercept. The flight leader went in screaming “EARF!” at the top of his lungs but in his excitement he and his wingman both missed! The second squad zoomed in from the opposite vector and managed to splash one Corsair, but only one! The survivor opened up on the Albatross but missed, his aim disturbed, no doubt, by his over-enthusiastic enemies! After this, the Albatross pilot moved forward as close as he dared and dropped the tanks into the fray!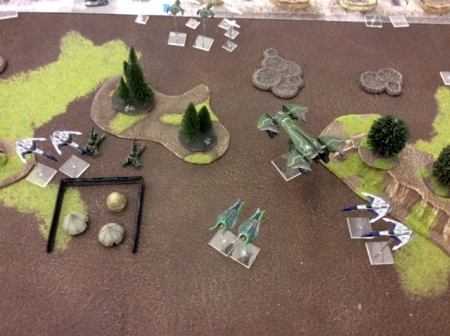
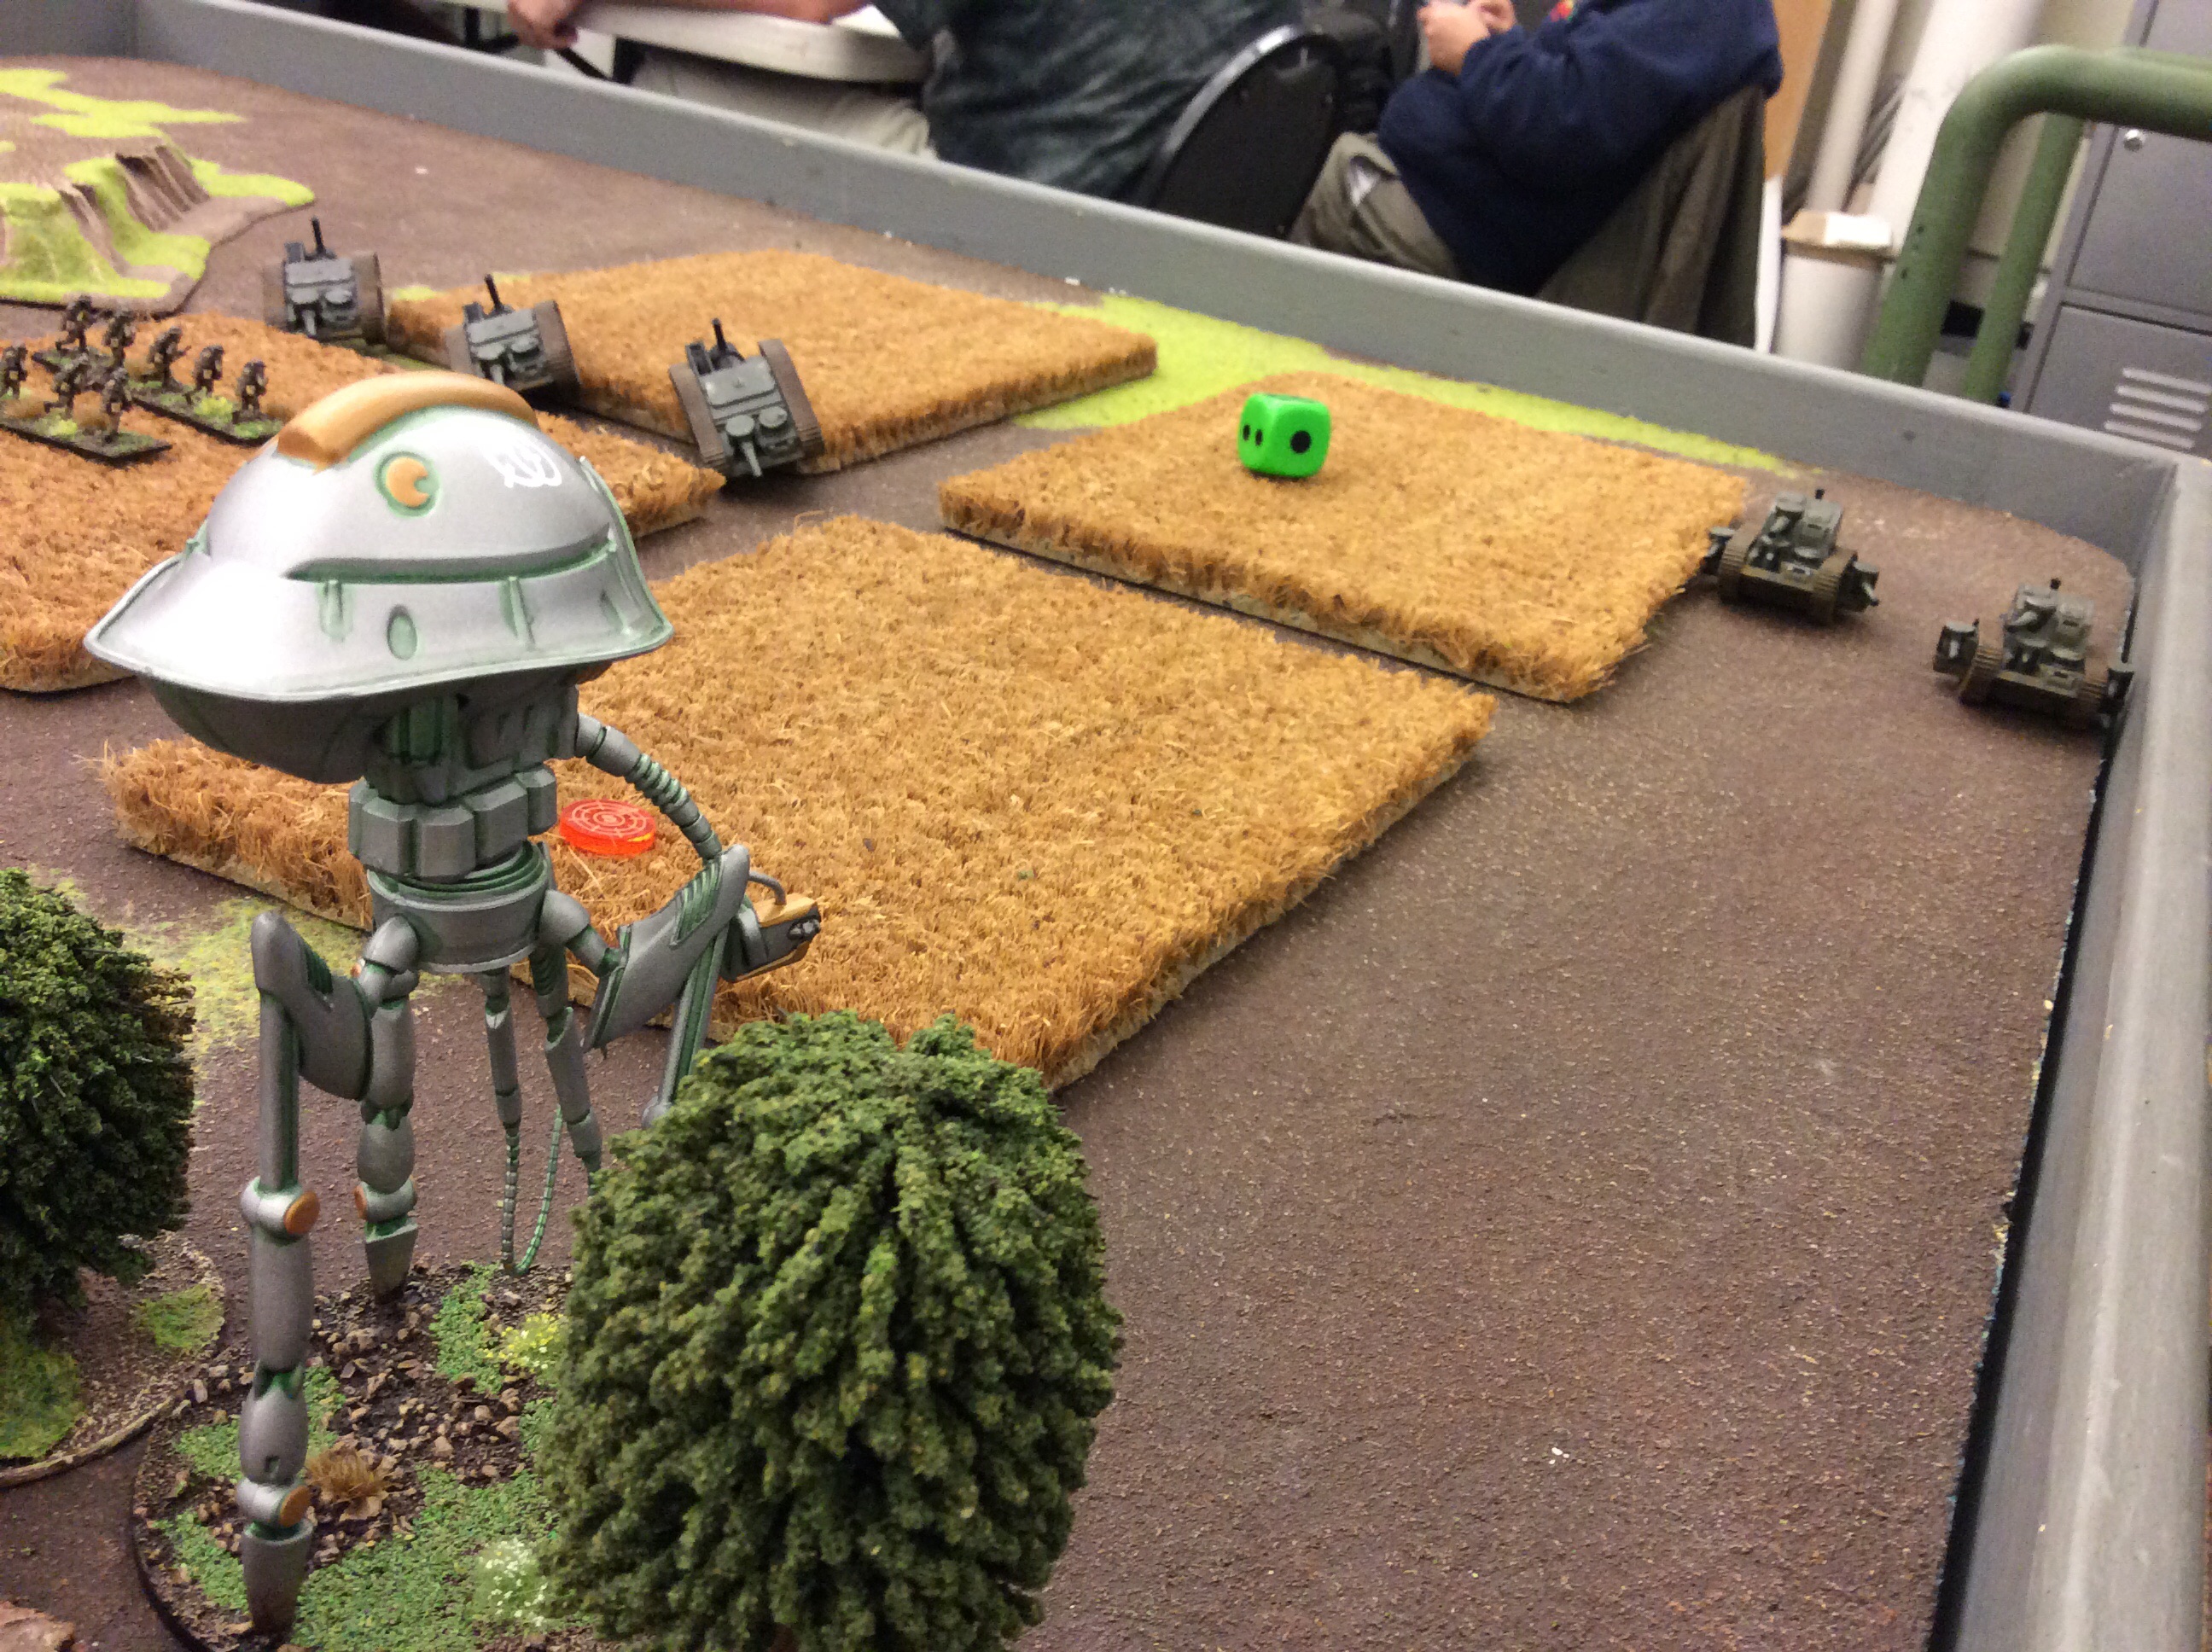
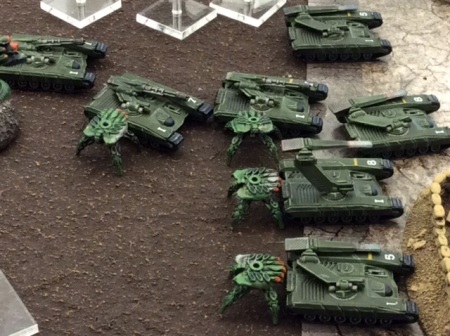
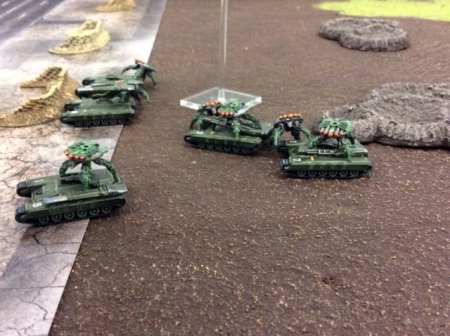
Turn 3 and the game develops! The Armor battle group rolls forward, hammering shots into the base fortifications. If I could take down a wall, I could possibly start picking off Reapers and clear the way for some Archangel runs on the Desolater. But I couldn’t bring the wall down. Steve began to threaten my Kodiak with his Prowlers and Reavers so I loosed off a hail of fire with my Rapiers, downing a fully loaded Invader and a Reaver. The Prowlers survived the crash, and with a mass of tanks nearby, turned their attention to a more inviting target. They couldn’t attack this turn, but if Steve won the next Initiative roll, my tanks were in trouble!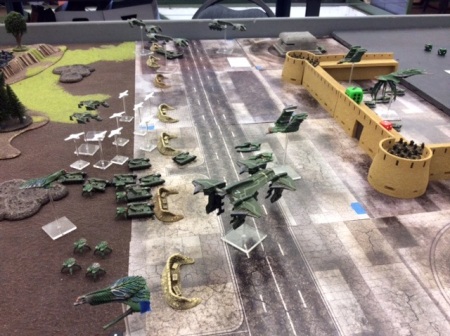
My Archangels squads had until now been busy elsewhere on the battlefield. This turn it was up to my drones to try and crack the AA bubble and get some fire on the Desolater. The drones swarmed in and the Reapers began reaction firing. The dice did not go the Scourge’s way – even with the Reaction Fire penalty, he should have been hitting half the time. Even the Warriors on the walls blasted away to no effect. In the end, I lost only 2 drones out of 8. They lined up on the Desolator and did 4 points of damage! With the Scourge AA Reaction Fire exhausted, the Archangel squads rolled in on the Desolator and blew it out of the sky! Mission accomplished?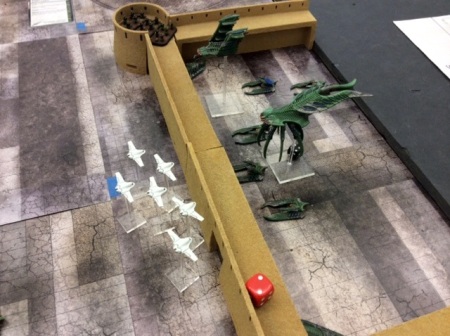
I revealed the Snipers’ position. The Scourge Warriors in that bunker downrange were definitely scoring hits! An earlier volley of AA fire from the troops on the walls had destroyed an inbound Condor and a mounted squad of Legionnaires. The Praetorians synched their cybernetic ballistic targeting computers together and ranged in on the Warriors in the bunker. Their combined fire sounded like one single shot…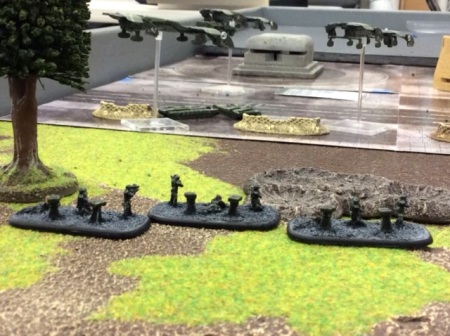
Seven points of damage on the Warriors! The Snipers managed one more shot later in the game, resulting in a total wipe-out of the Warriors!
The Scourge have lost their Overseer, and now enraged, seek to do as much damage to the humans as they can before they escape. As the UCM frantically tries to withdraw from the fight, the Prowlers leap onto the Sabers and Rapiers for a hot plasma injection!
Not much left of my armor! The tanks slam into reverse and pull back, shaking off a few Prowlers. Hoping to both pick up its tanks and kill their tormentors, the Albatross swings around bringing all its guns to bear! The tanks also unleash heavy machine gun fire at the walkers, while also taking down the fortress wall with a few shots from their railguns.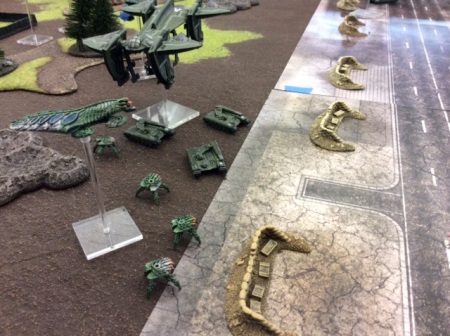
The fight on the runway has been close and deadly, leaving the field covered in burning wrecks! 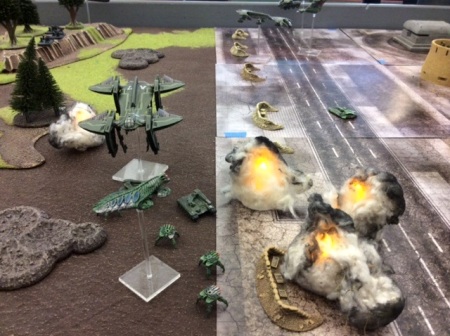
With an untouched Scourge battle group now entering the fight, the UCM forces mount up and firewall their throttles to escape!
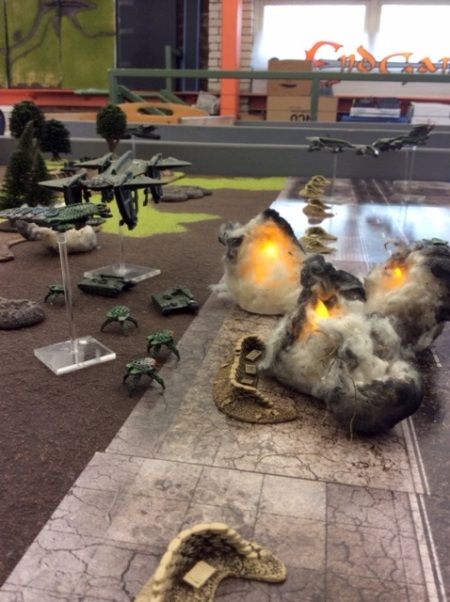
Final positions at the end of Turn 6. Most of my units have exited the board. Steve made a desperate push to catch up and was closing in on the Ferrum. The Legionnaire-carrying Condor was shot down, but the Bear and the troops inside survived the crash, but were still on the board. The Praetorian Snipers, their mission complete, activated their therm-optic camouflage and crept carefully away from their hide-site. They knew they would be walking home…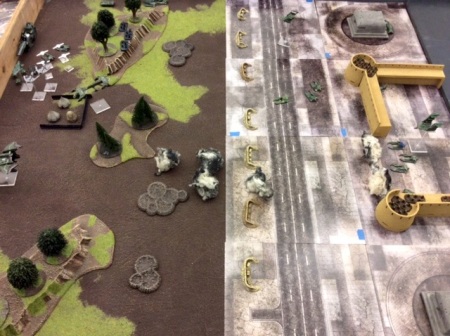
In the end, a Strategic Victory for the UCM. In our next game and for the rest of the campaign, the Scourge cannot have a Commander higher than an Overlord (Lvl5) since Broken Tower was killed. We took a look at UCM losses to see at what cost victory was won for the UCM – I lost my entire armor battle group except the Albatross, plus a few other units, but it all came out to about 25% of my force. Acceptable losses.
It was a great game. Had Steve’s dice been better when he was rolling for Reaction Fire against the drones it could have been a much different game – I would have had to risk the Reaper AA bubble with the Archangels.
So now we’re talking about where our campaign goes next. In Phase 1, the UCM recovered vital info on the Scourge, allowing them to progress to Phase 2, which was a strike against the Scourge command. With success for the UCM so far, we think General Magaday is going to commit his forces to an operation to establish a secure beachhead, so we’re looking at a straight-up clash of forces, probably with the Bridgehead scenario. Focal point missions are always a scrum!
Thanks to Steve for a great game!