Archive for Vehicle

Magnet Madness! Rhino/Razorback/Predator

Posted in WIP with tags , , , on January 26, 2012 by stingersix

So I got myself a Predator, and of course, since it’s built on a Rhino chassis, I knew I was going to magnetize the hell out of it so I could switch between Rhino, Razorback and Predator. Now that I have done so, I think it’s brilliant that the model was designed with this potential.

Magnetizing all the pieces required twenty-eight 1/8″ and seventeen 1/4″ magnets (at 1/32″ thickness) and took me two evenings to do, so maybe 6 – 8 hours of work total.

Consider the humble Rhino, before it gets all dressed up.

I put a stack of magnets inside the door wells. They’re just high enough to contact the magnets glued to the doors.

The sponson mount doors have 1/4″ magnets on them, which give a good solid contact with the magnets in the door wells. The regular Rhino doors have a 1/8″ magnet mounted on a piece of sprue cut to the right length and stuck to the door.

Magnetizing the sponson weapons was also somewhat challenging. I cut off the pins on the weapon mounts themselves and glued 1/8″ magnets on the ends. This was pretty fiddly. The result was not so strong so I added a thin strip of green stuff wrapped around them and this is more sturdy. I went slow and measured and checked everything before gluing stuff in. The sponsons were the most time consuming.

I added these magnets on the front so I could attach the hedgecutter.

I’ve seen solutions for magnetizing the turret that involve a piece of sprue glued onto the mounting plate. I wanted to use this as a Razorback as well and gluing a spar in place would block the weapons in that configuration. So to enable both set-ups, I glued a piece of sprue inside the turret and put a magnet on that. Then I cut another piece of sprue just longer than the diameter of the hole in the turret ring mounting plate and put a magnet on that. This way I can attach the Predator turret and it stays on, and easily remove it if I want to put in a Razorback gun mount.

Here are the main guns. I cut the pins off the mantles and put in the magnets.

The turret was a little difficult. The magnets went in easily since the holes were already about 1/8″. I had to back them up with some greenstuff. The piece of sprue on the front there keeps the guns from drooping, and that meant I had to cut a small piece out of the inside of each gun mantlet which was hard to get right.

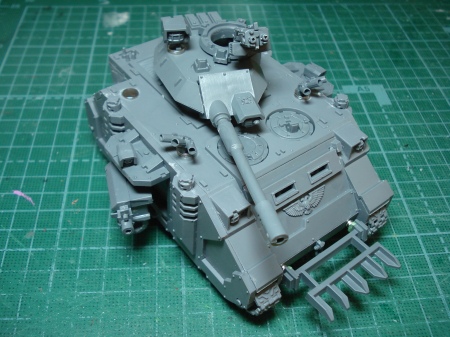
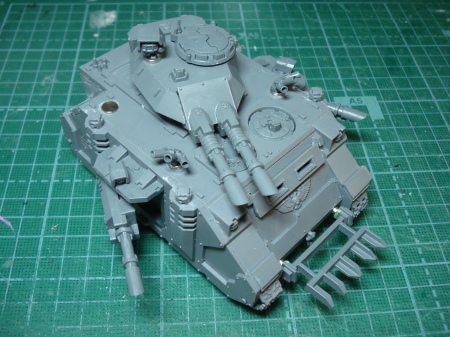
Here’s the finished product.

The 1/4″ magnets on the top of the hull and turrets allow mounting of smoke launchers, searchlights and other accessories. The rear of the turret is magnetized so the ammo bins can be changed depending on which main gun configuration I’m using. The storm bolter is also magnetized so that I can put on the pintle mount or the hull mount.

So in the end I think it was worth the work as I now have three vehicles in one!

I need to order more magnets!

Old Crow tanks – done!

Posted in Minis with tags , , , on April 25, 2011 by stingersix

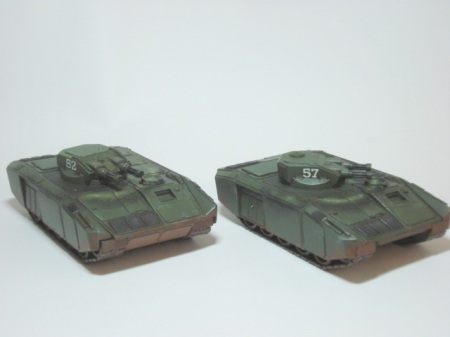
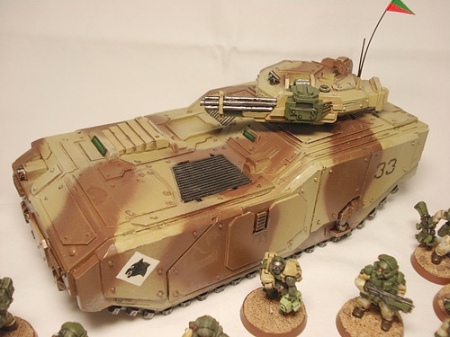
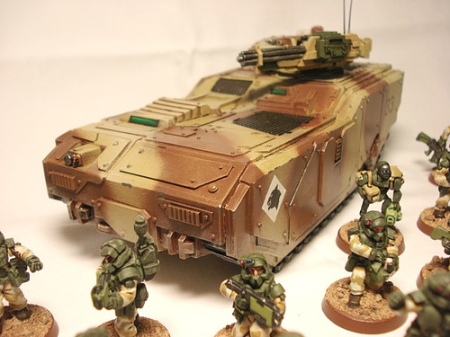
Just finished those two Old Crow tanks/IFV’s I picked up cheap last year. I was originally going to do them in desert yellow but I ran out of it halfway through and Ace Hardware in Berkeley was sold out. So, I got a can of NATO Green and that came out really nice. No fancy camo this time, just the basecoat and weathering.

These guys will be making their debut in an upcoming Stargrunt game, for which of course I’ll do a full batrep and pictures!

New acquisitions and WIP

Posted in Blather, WIP with tags , , , , , , , , , on September 13, 2010 by stingersix

I went to EndGame, Oakland’s 2nd Annual Miniatures Bazaar on Saturday. It didn’t seem as varied as last year – perhaps everyone sold off a lot of stuff last go-round? Anyway, only Josh had any real variety (the rest being almost entirely GW stuff), and he had some good stuff!

The first good deal I got was these Old Crow Lancers. One assembled, the other still bagged, for $15 for both (they’re normally $32 each less shipping). These will definitely be making an appearance in our Stargrunt games!

Also from Josh, I picked up a boxed set of the old Starship Troopers Cougar Exosuits, which are now quite hard to find and expensive when you do find them. $10 for the set. Unfortunately, it had 5 right arms and 3 left arms (there are 4 exosuits). Mongoose quality control FAIL! I’ll figure something out though. I really like these minis – the exosuits are some of the best power armor in 28mm ever made, even if Mongoose did make them.

And now for something completely different – I am also an avid RPG player and I picked up some Hasegawa 1/48 scale pilot figures for a game called Godlike (it’s a WW2 game with super powers, kinda like X-Men meets Saving Private Ryan). I sometimes use minis for this game, and these figures will be used to represent player-characters in the game. I’ve stuck them on their bases and prepping them for priming.

That guy on the right there is obviously not part of the set. He’s U.S. Marine by Reaper Miniatures I believe, though I’ve forgotten the exact title.

All four of these guys will see some paint in the very near future.

Finally, I bummed a couple Cthulhu figurines off my friend Wayne. These dudes are made by FFG and I’m going to put the big one on top of my alien pyramid when I finish it. The smaller ones maybe go on the corners.

And finally, I’m working on a Spug warrior from Spriggan Miniatures. Just trying to get a color scheme down. No picture yet – I’ll post one when it’s done. Painting up a force of Spugs is going to be my next big project once I clean up all these little ones.

Starship Troopers – Marauder

Posted in Minis, Uncategorized with tags , , , on May 4, 2010 by stingersix

Lazy me. I said I’d put pics up of the SST Maruader weeks ago. But, recently my urge to paint has rekindled fully and I’m forging ahead with new projects, of which the Marauder was the kickoff. I recently bought a squad of GW Space Marines off eBay (I got a deal – them plus a Rhino for about $35). I’ve started working on them but I’ll speak more about them and put some pics up in another post.

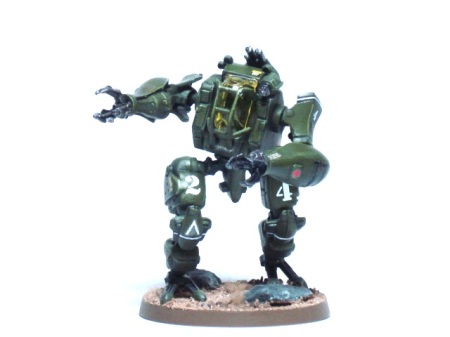
So, here’s the Marauder!


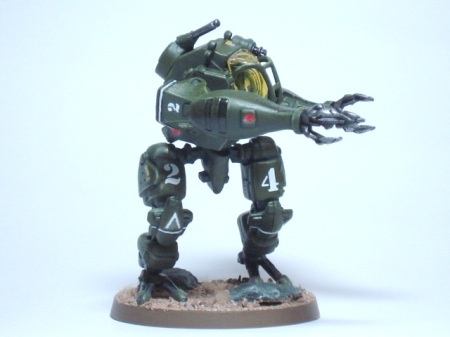
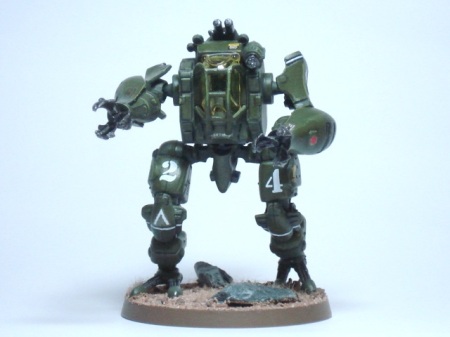
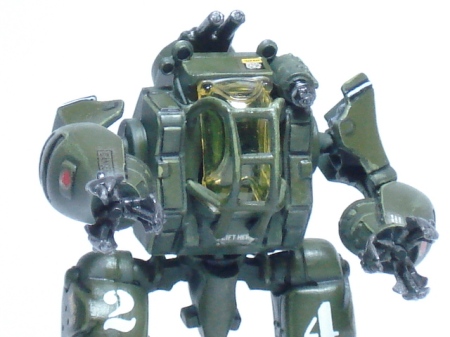
I lost the pilot figure somehow, but that’s okay ince you can’t really see it very well inside there. The cockpit canopy was originally clear, and since I liked the way the faceplates of the regular troopers were tinted, I wanted the same effect here. So, I used a thinned out wash of GW yellow ink applied to the inside of the canopy. Turned out pretty good. I find that I like the SST minis more than I thought. The only drawback is they don’t go together so well – the trooper models have a lot of fiddly bits some parts of the Marauder seemed to be slightly off. But, once past that, they’re all right.

Paper models – Dropship

Posted in Minis with tags , on June 16, 2009 by stingersix

If you surf around long enough, you’ll find there are a lot of people out there making some very cool paper models, some specifically for wargaming and most free to download.

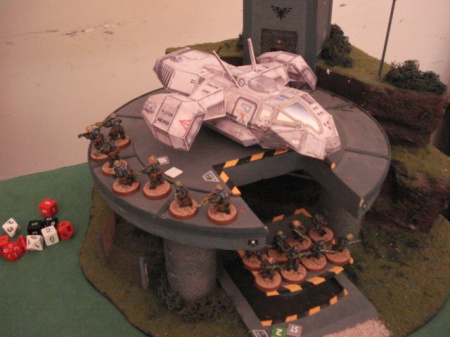
One of the best I found are those made by this guy in Spain, his site is called Toposolitario. I downloaded his Pluton B dropship and UHV2000 Walrus hover APC. I printed them out on 100lb test paper and they went together very nicely. Since the color patterns are printed on, there’s no painting necessary. I can’t say they’re easy to assemble – they’re made with some sort of CAD program that makes them rather complicated. But if you’re careful and patient, the effect is very nice.
3338377981_13683f76d6_o

I’ll try and get some pics up of the two APCs I made. In the end, I got three nice-looking paper models that, were they made of plastic, resin or metal, probably would have cost me well over $50 all together. All I paid for was the paper, about 6 bucks. I should go sling the designer a few bucks on PayPal for his labors…

Pig Iron Productions – Pt.2

Posted in Companies, Minis with tags , , , on June 11, 2009 by stingersix

As far as I can tell, one of the first things Pig Iron Productions produced was their resin vehicle line.  This line of armored vehicles is made especially versatile by the line of turrets available. Basically, you can have a tank, an APC, or an IFV simply by putting on the appropriate turret on top of the basic vehicle chassis.

When I first came across it, I immediately liked it. First, it was big – it actually looked like it could hold 8 men and their equipment inside. Second, it didn’t have skulls all over it. Third, I could get it in any of three versions.

It’s a resin kit, but is very easy to put together. It has a few metal fittings that go right on without any real trimming or cutting necessary. The chassis is all one piece, so you just glue a backplate on to it, and then attach the turret. The IFV turret can be customized with different weapons too!

I got the Ironstorm. Mine looks like this:

2160680271_e22437f864

Like the infantry miniatures, the Ironstorm paints up very easily. I used Tamiya spray paint to do this color scheme, and managed to get the camo pattern without an airbrush. The insignia on the side comes out of my bits box, where I have a stack of old model decals. I made the radio antennae out of a piece of plastic sprue stretched over a candle flame (an old modelling trick). The turret rotates freely, and the chain gun on the side is metal. If you look at the model closely, it really is a very simple design, but it’s really executed well.

Maybe the best thing about this model is you can paint or convert it in all kinds of different ways. I’ve seen 40K players stick 40K vehicle bits on it (read “skulls”), other paint jobs reminiscent of WW1 tanks, all kinds of stuff. This model really sparks your creativity!

2160680285_5490dc6319

And I also like it simply because it’s different. You don’t see this model on the gaming table very often, if at all. The few times I’ve had it out, people are always asking about it.

There’s another more in-depth review of this kit on the excellent but sadly no longer updated Wee Toy Soliders blog.